
입력하세요
메뉴
Mintegral Pixel: Shopify 스토어 연동 가이드
Integration Guide
이 가이드는 Shopify Store에 Mintegral Pixel을 연동하는 방법을 설명합니다.
⚠️ Note: 이 연동 방식은 Headless Mode로 운영하는 판매자에게는 지원되지 않습니다. Headless Mode로 운영 중인 경우 Custom Online store Integration을 통해 Mintegral Pixel을 연동하세요.
Shopify Store Integration (Shopify Native Checkout)
Shopify 기본 기능과 결제 프로세스만으로 구축된 스토어(제3자 checkout 또는 payment 앱을 사용하지 않는 경우)의 경우, Shopify의 표준 pixel 설정을 사용해 Mintegral Pixel을 완전히 연동할 수 있습니다.
Integration Steps
-
Settings를 선택합니다.
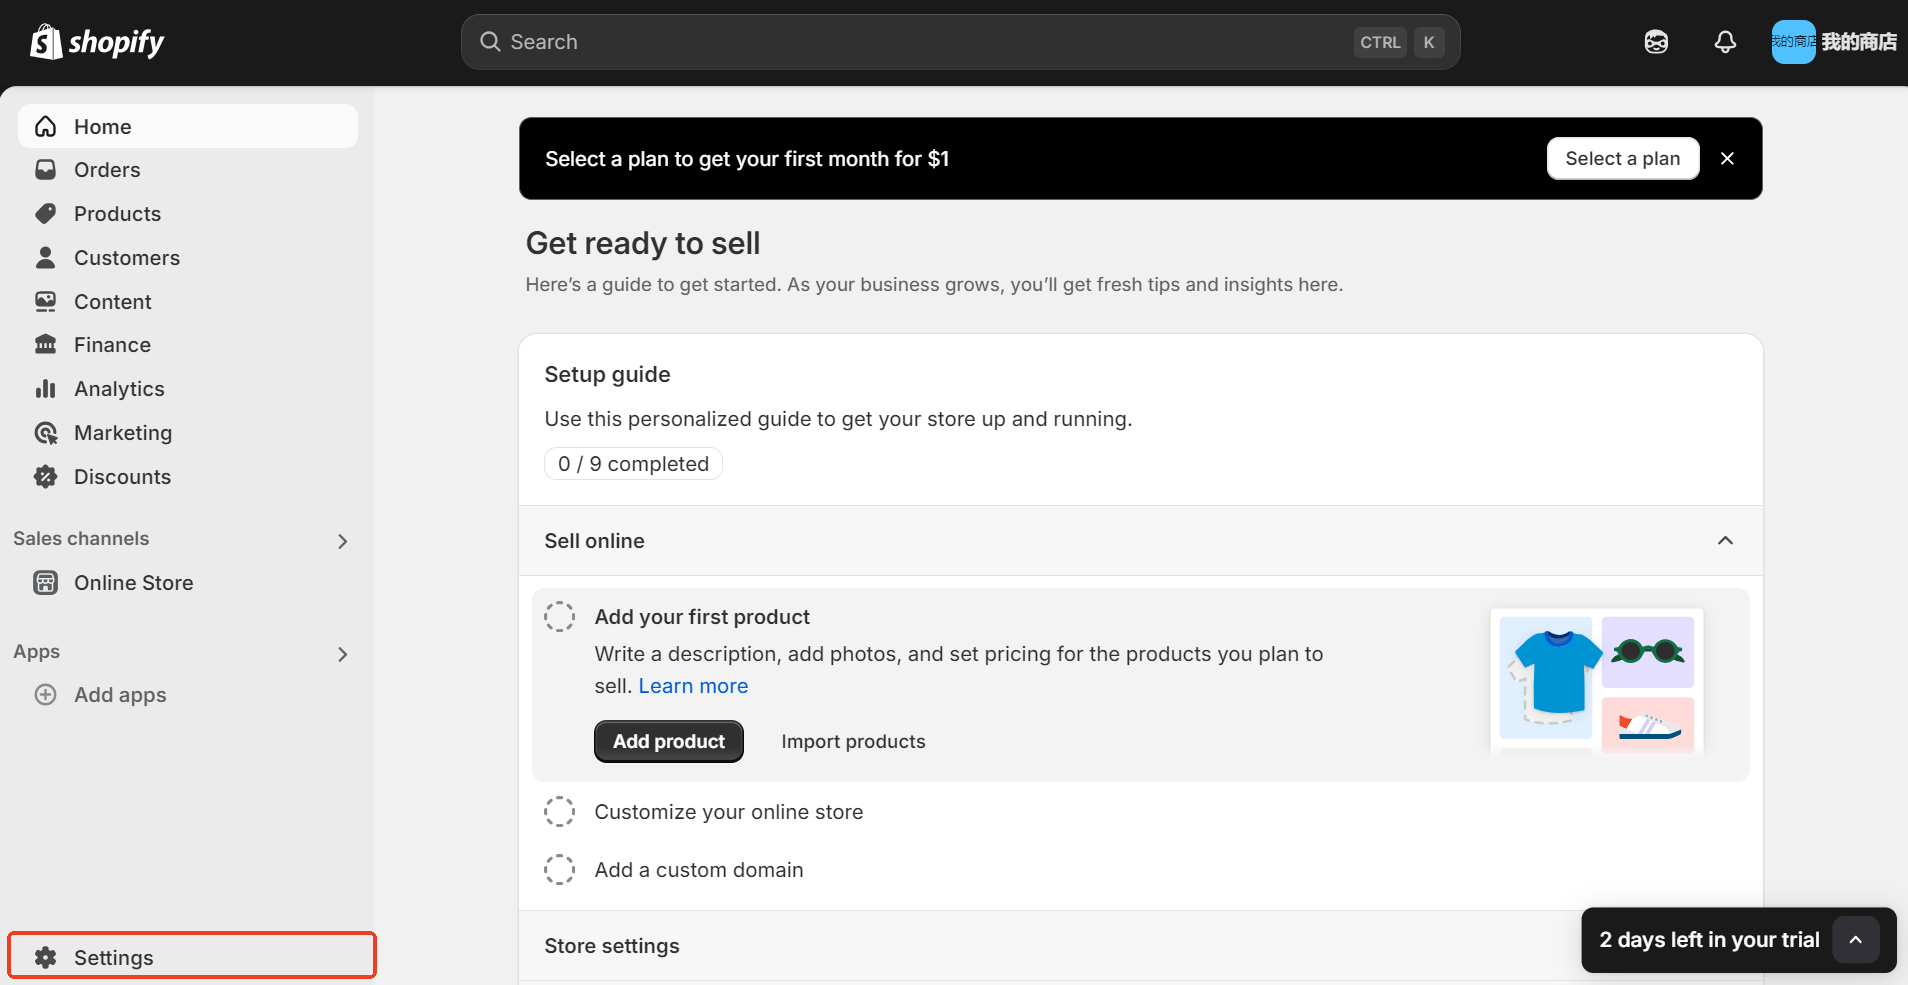
-
Customer events를 선택합니다.
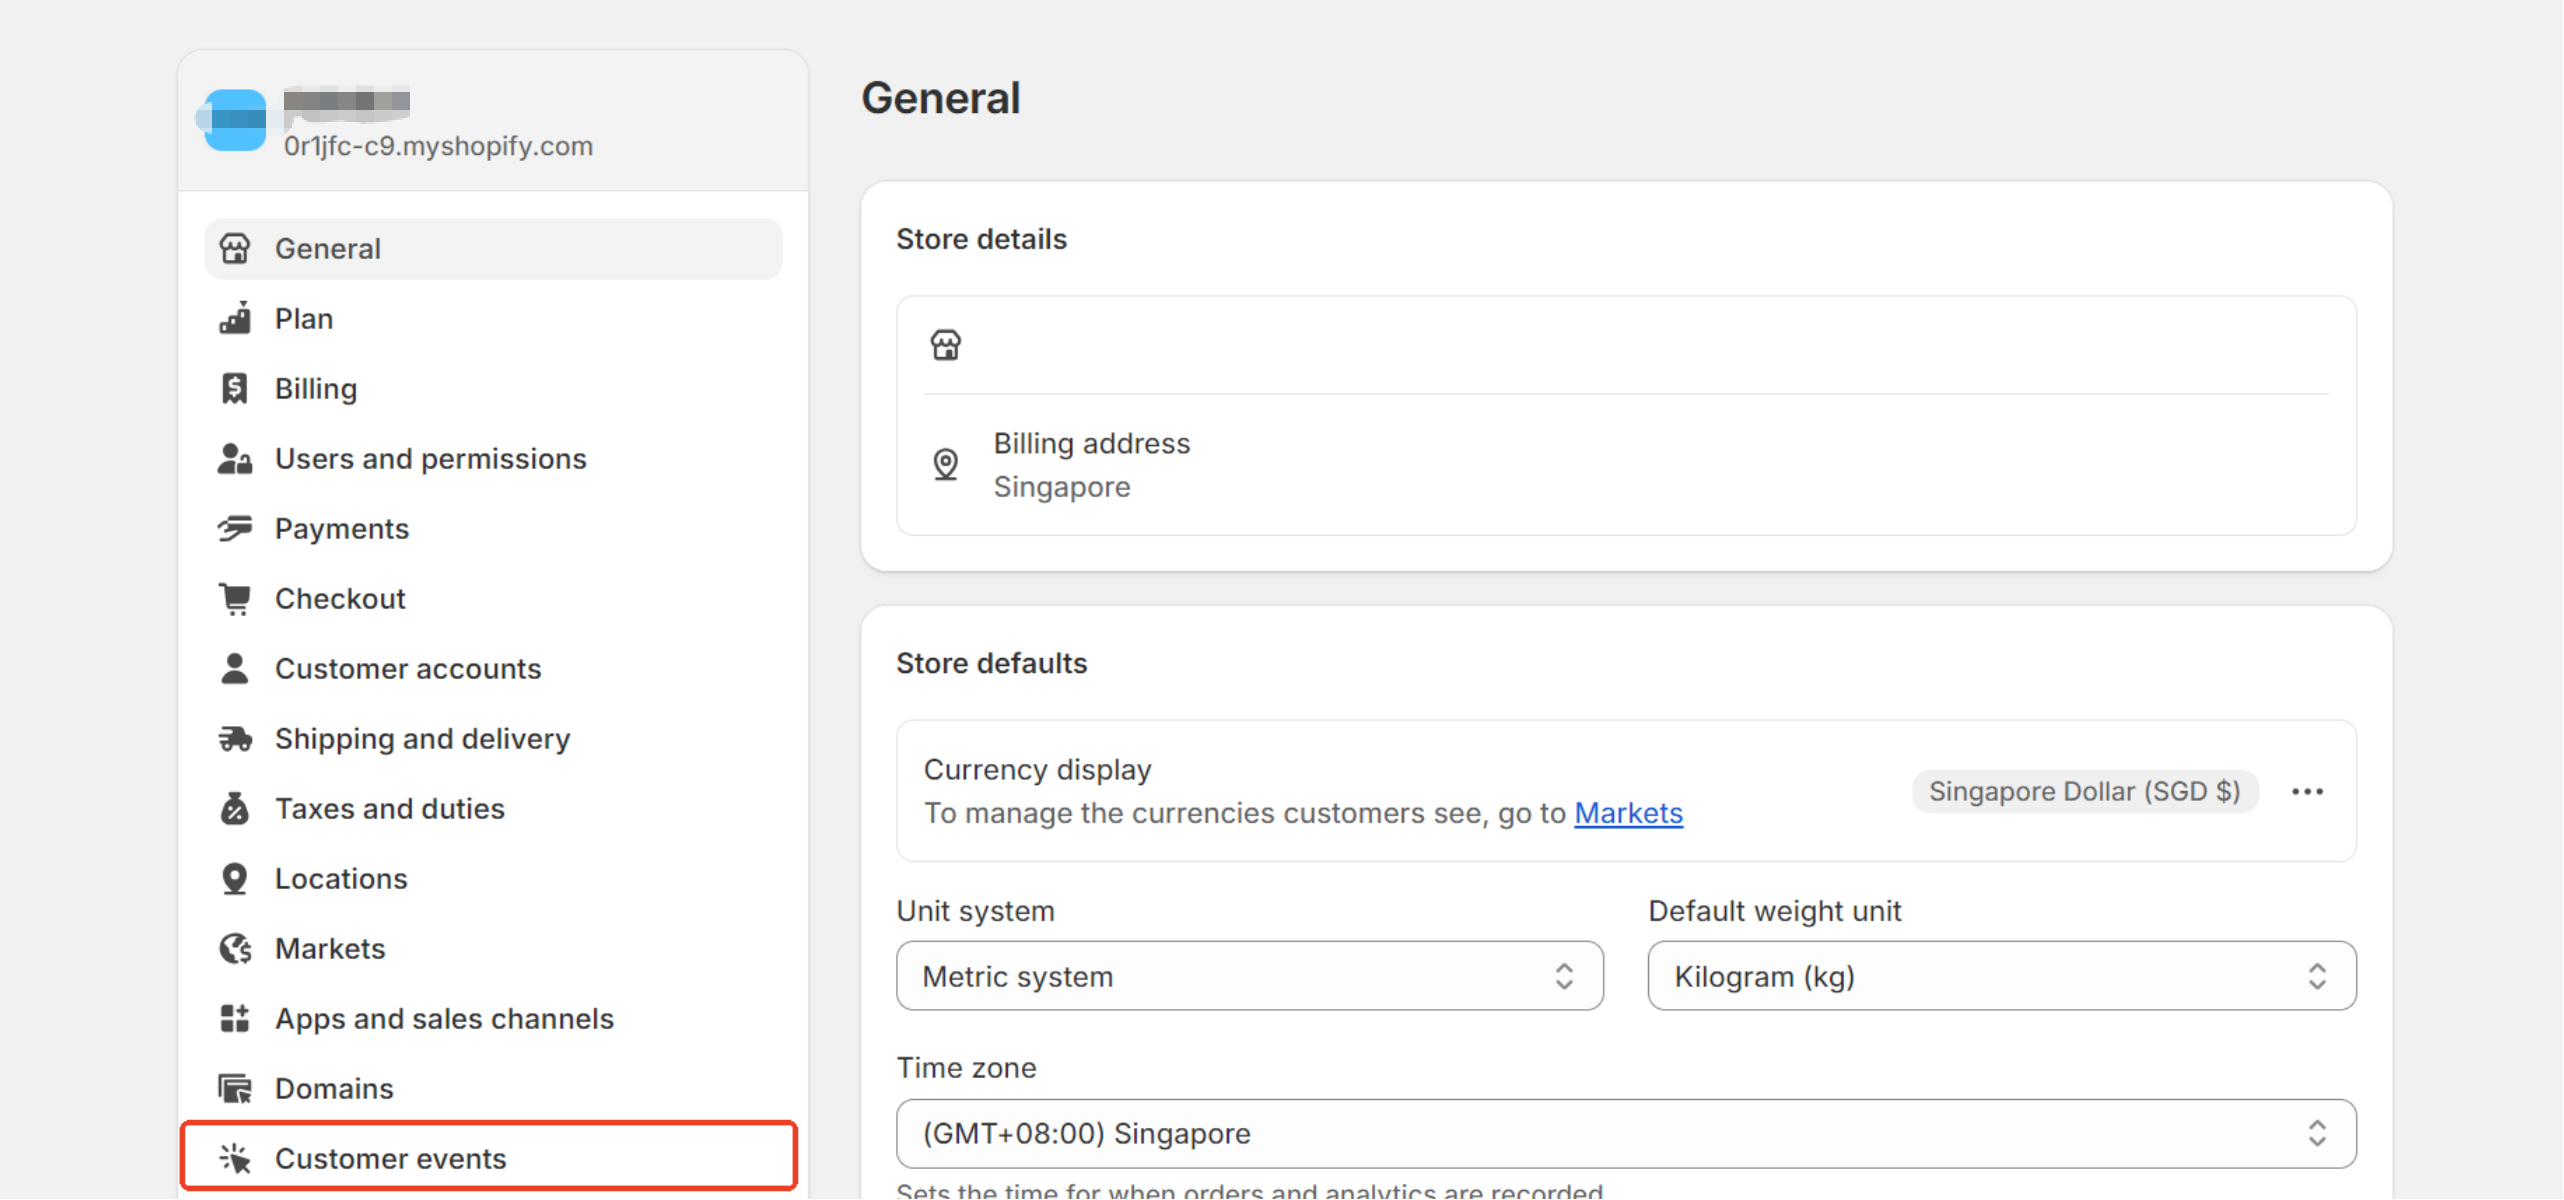
-
Add custom pixel 버튼을 클릭합니다.
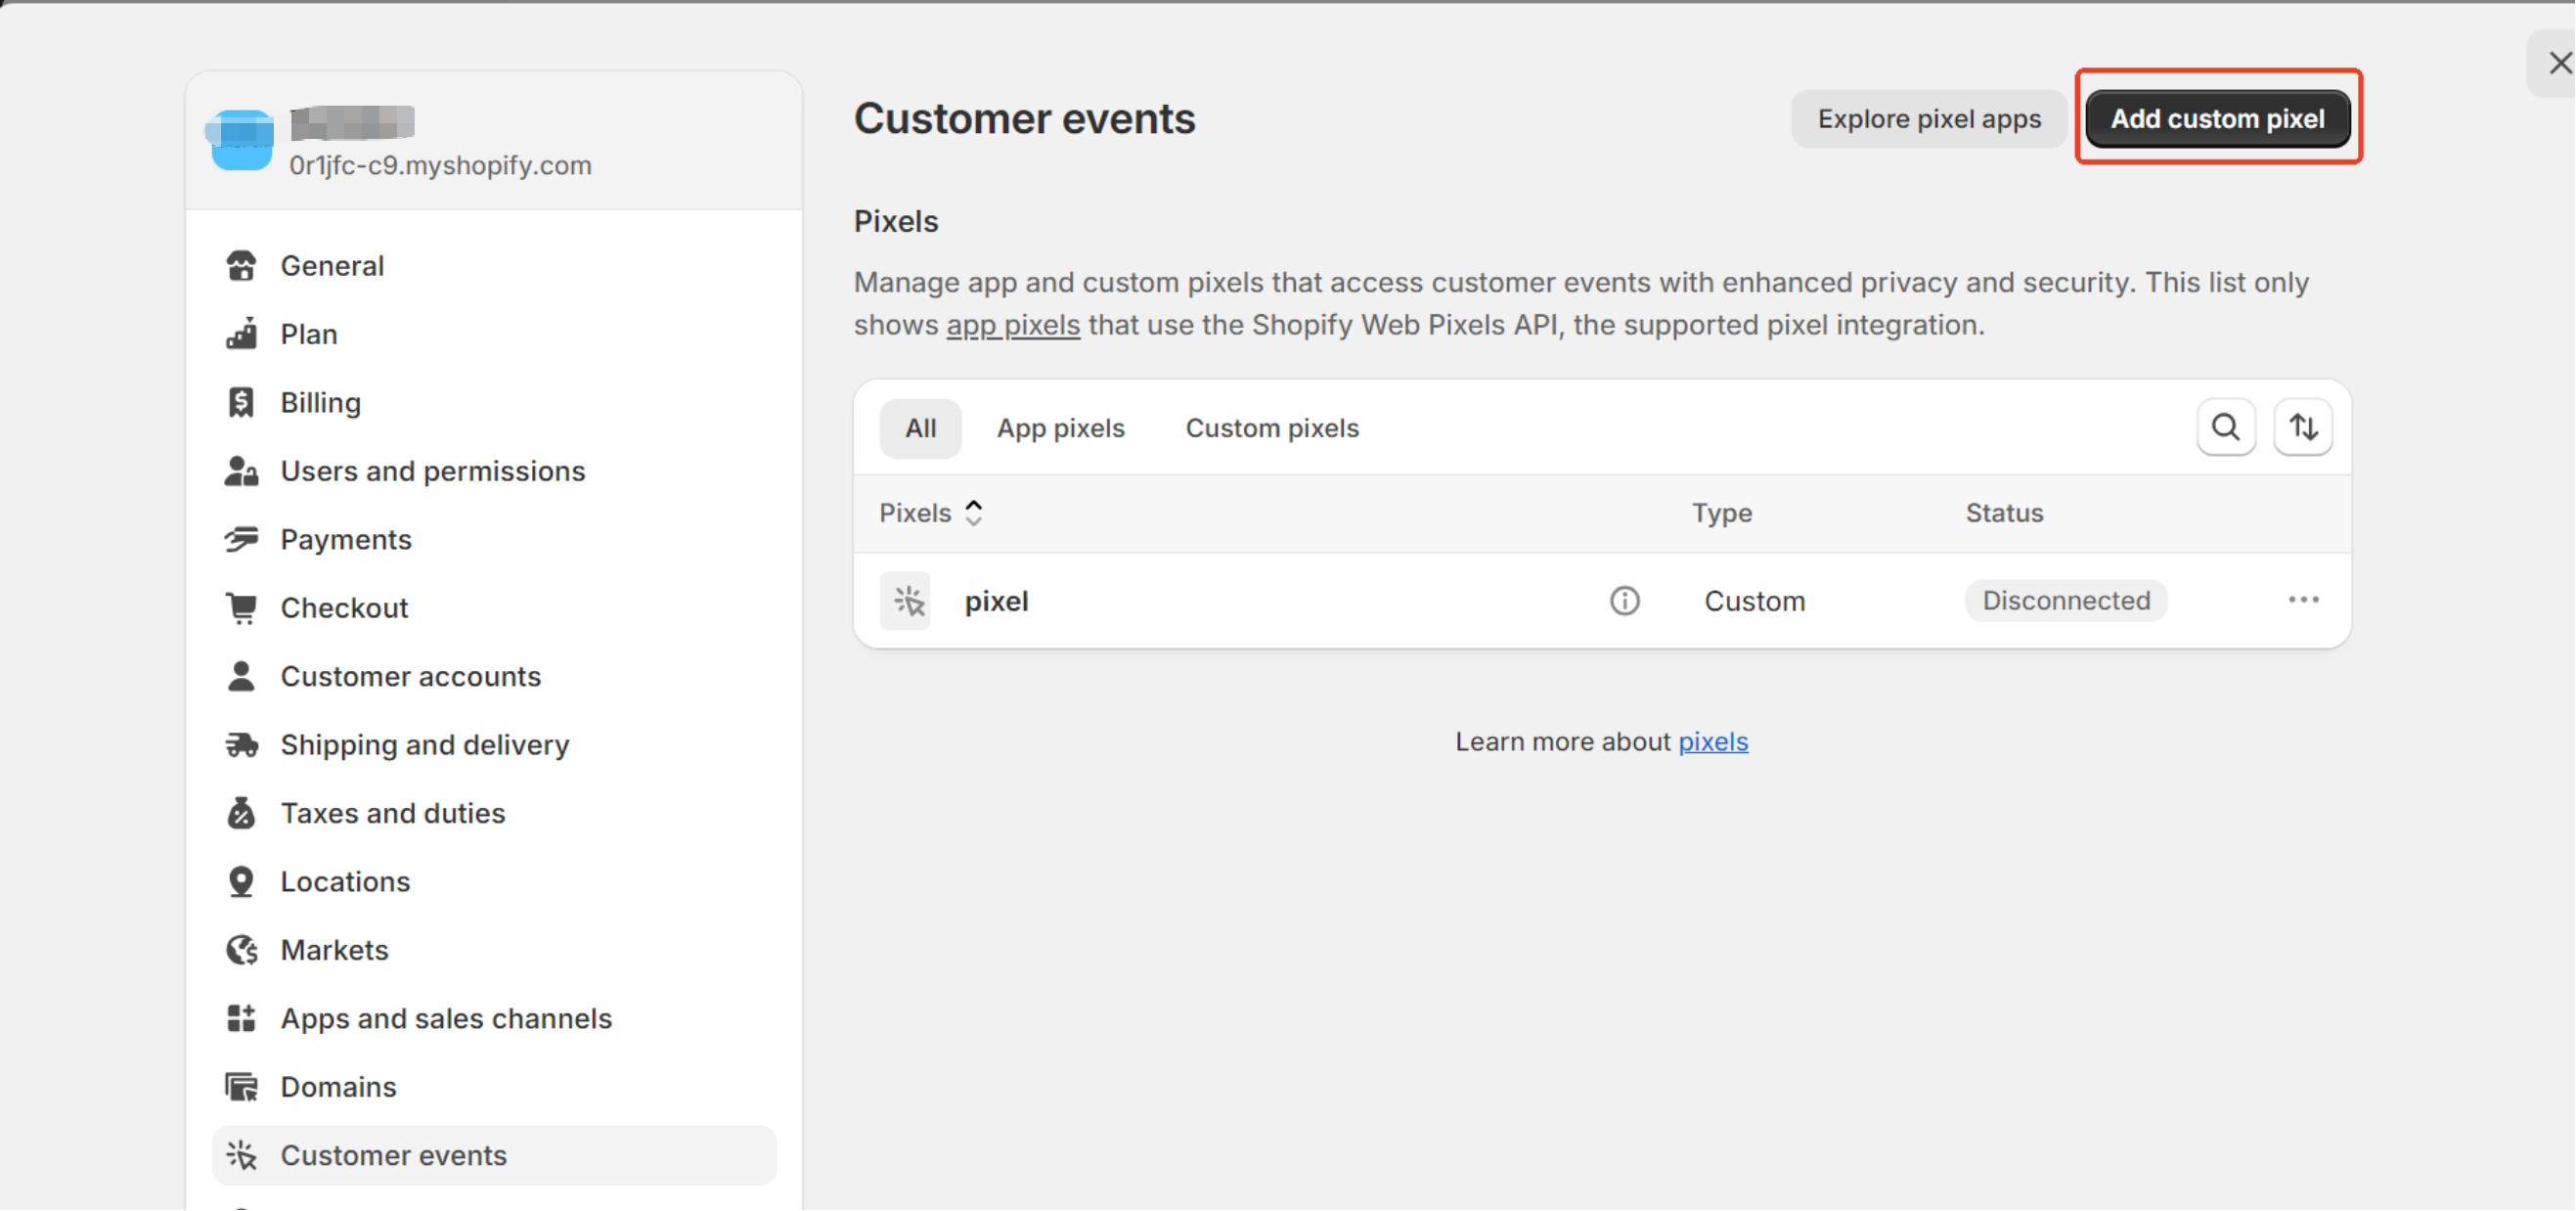
-
Pixel name으로 "Mintegral Pixel"을 입력한 다음 Add pixel을 클릭합니다.
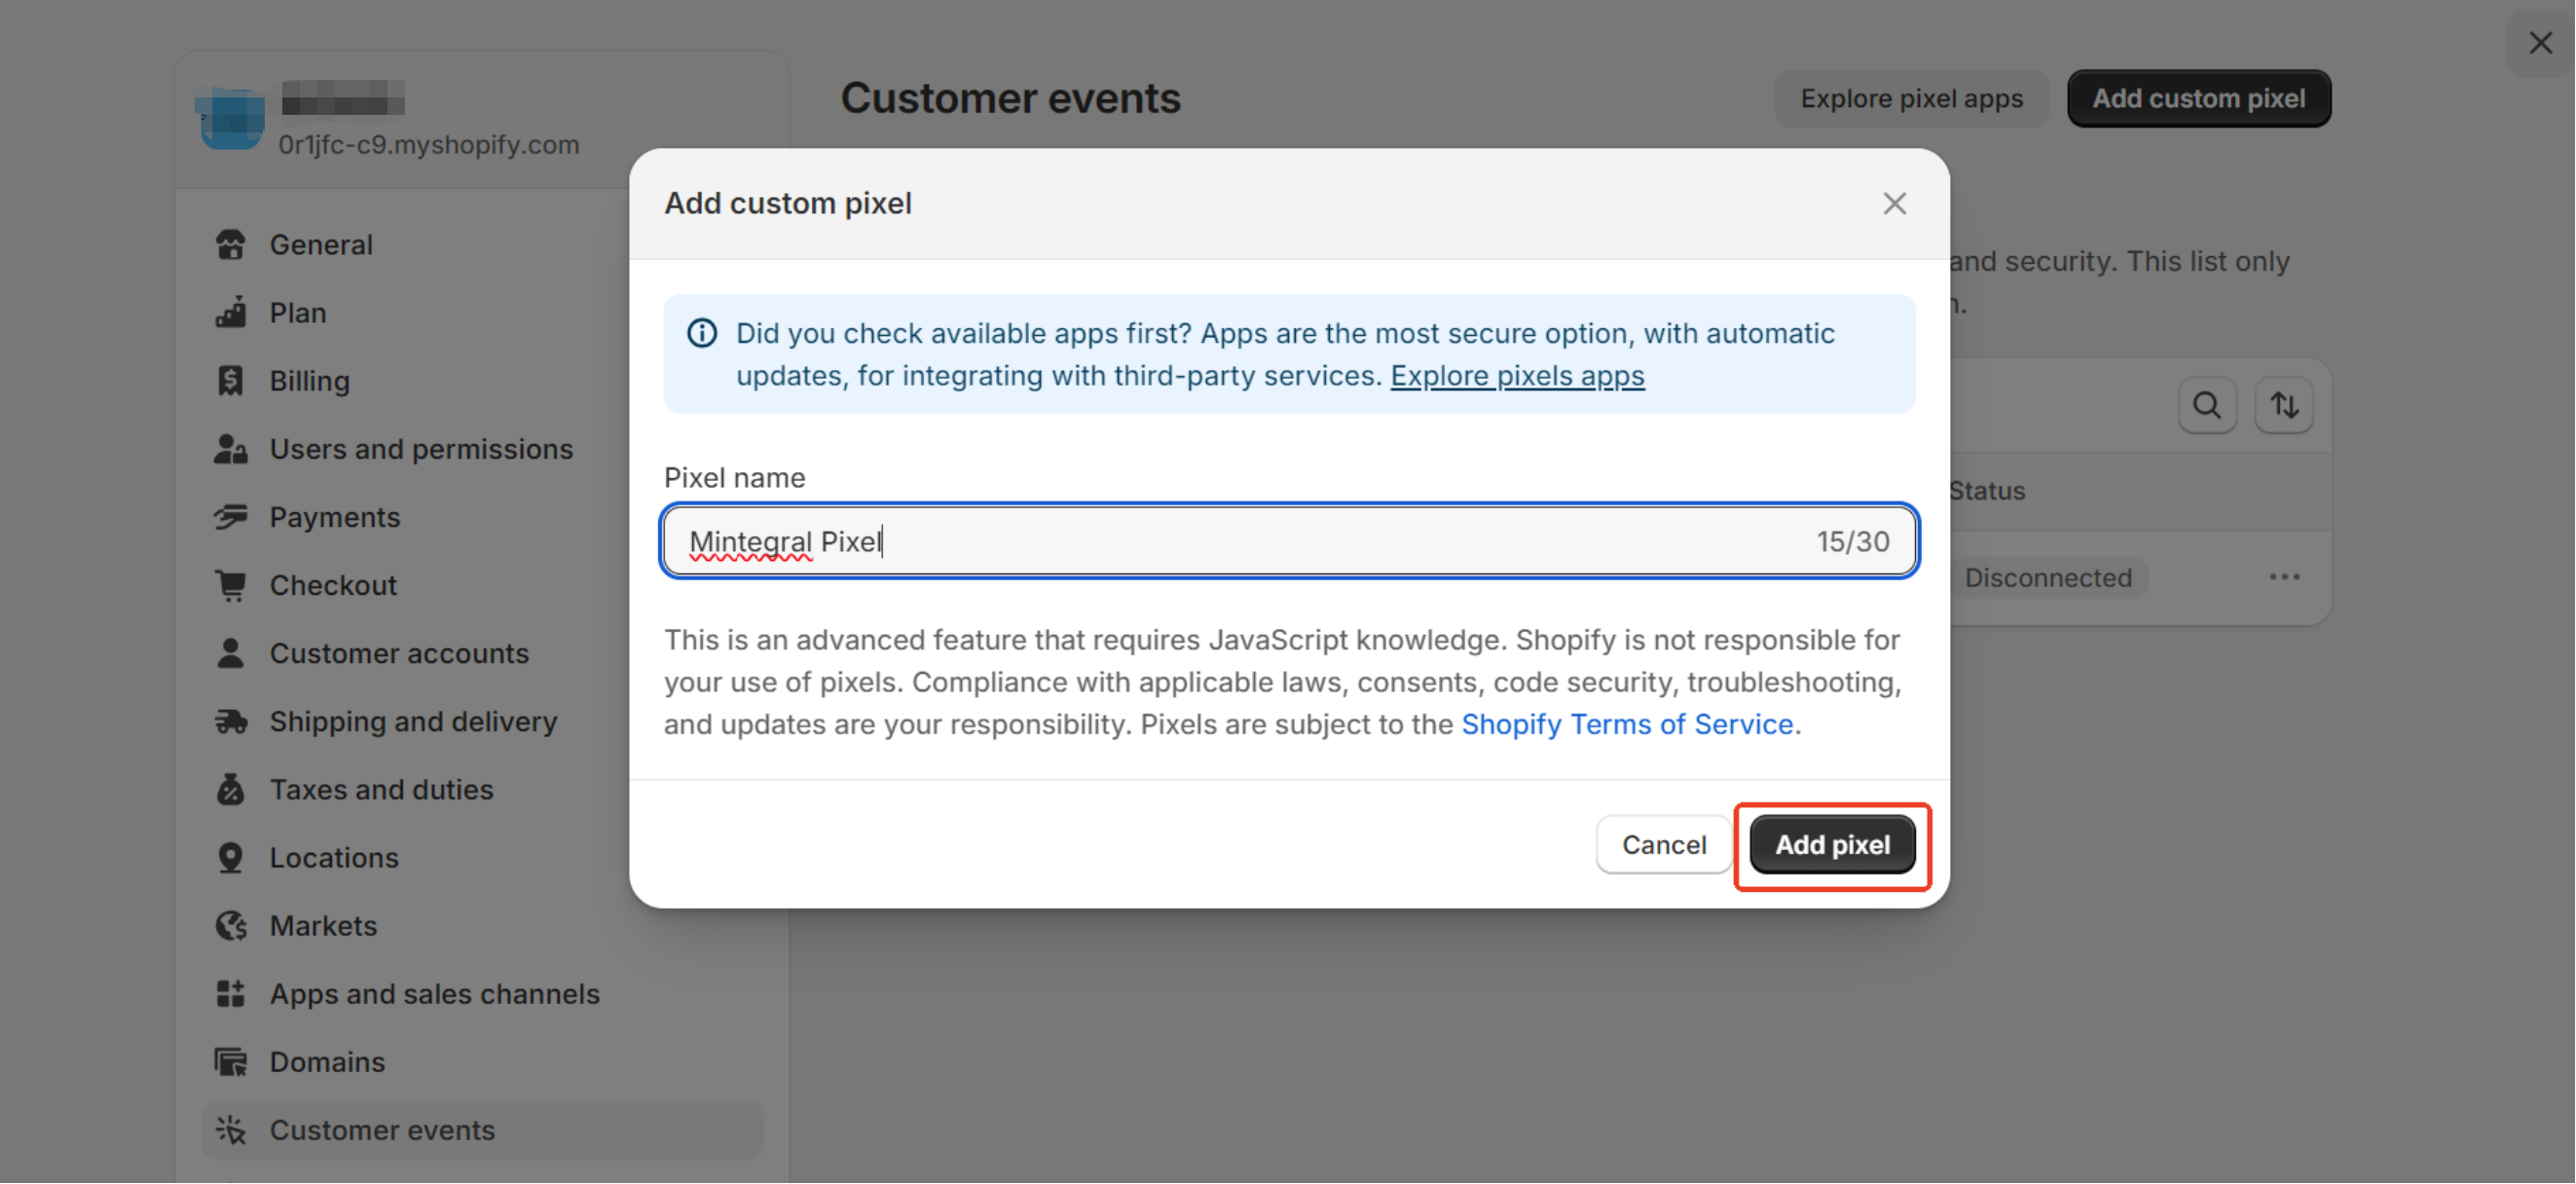
-
다음 코드를 복사하여 코드 필드에 붙여넣은 후 Save를 클릭합니다.
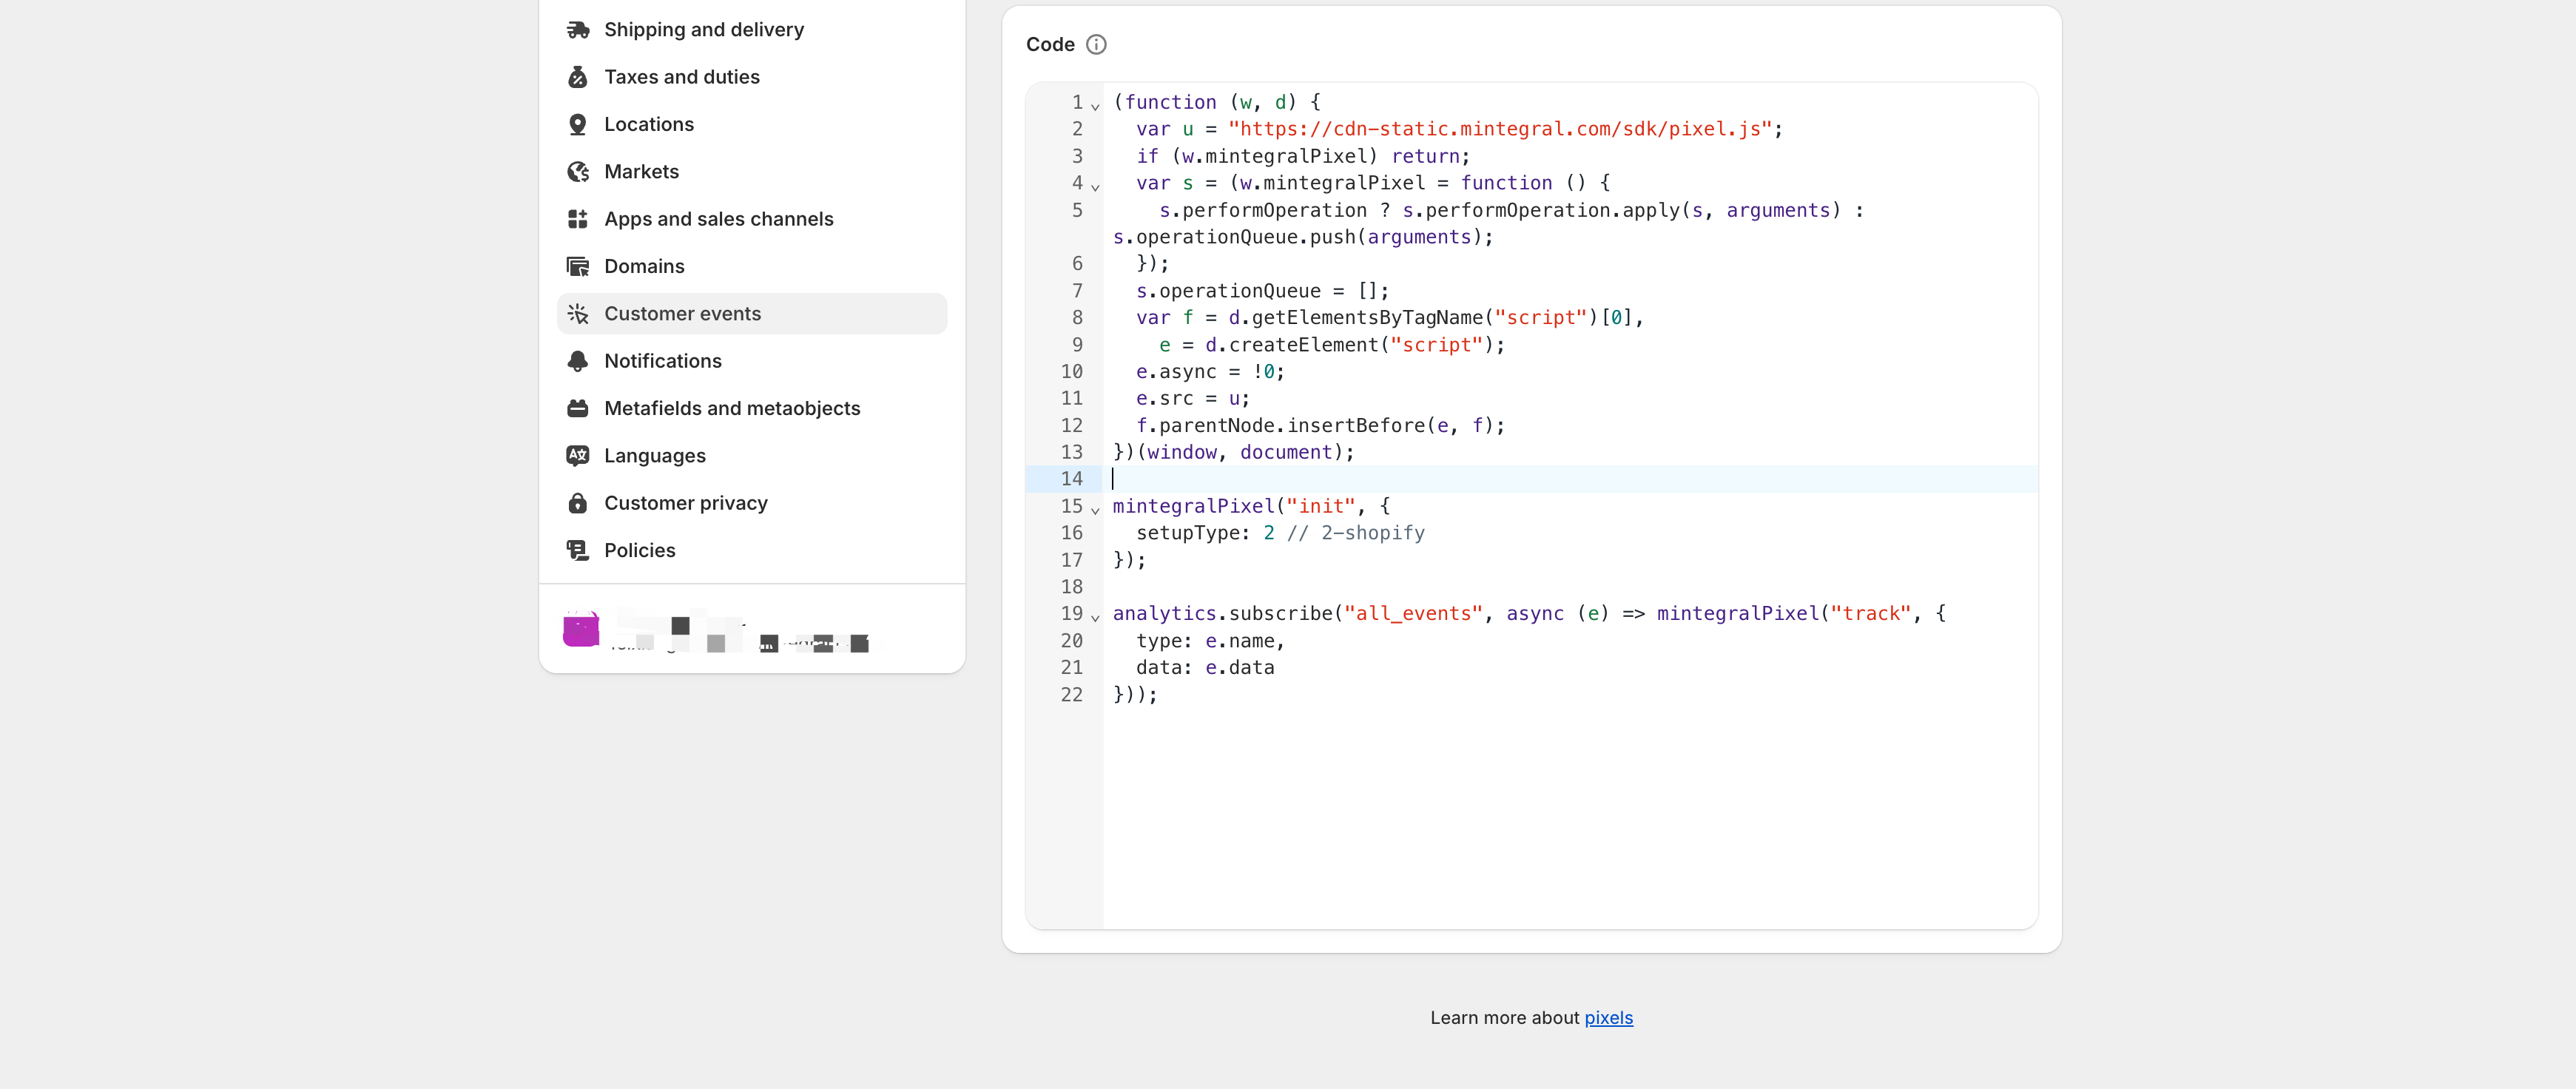
(function (w, d) { var u = "https://cdn-static.mintegral.com/sdk/pixel.js"; if (w.mintegralPixel) return; var s = (w.mintegralPixel = function () { s.performOperation ? s.performOperation.apply(s, arguments) : s.operationQueue.push(arguments); }); s.operationQueue = []; var f = d.getElementsByTagName("script")[0], e = d.createElement("script"); e.async = !0; e.src = u; f.parentNode.insertBefore(e, f); })(window, document); mintegralPixel("init", { setupType: 2 // 2-shopify }); analytics.subscribe("all_events", async (e) => mintegralPixel("track", { type: e.name, data: e.data })); -
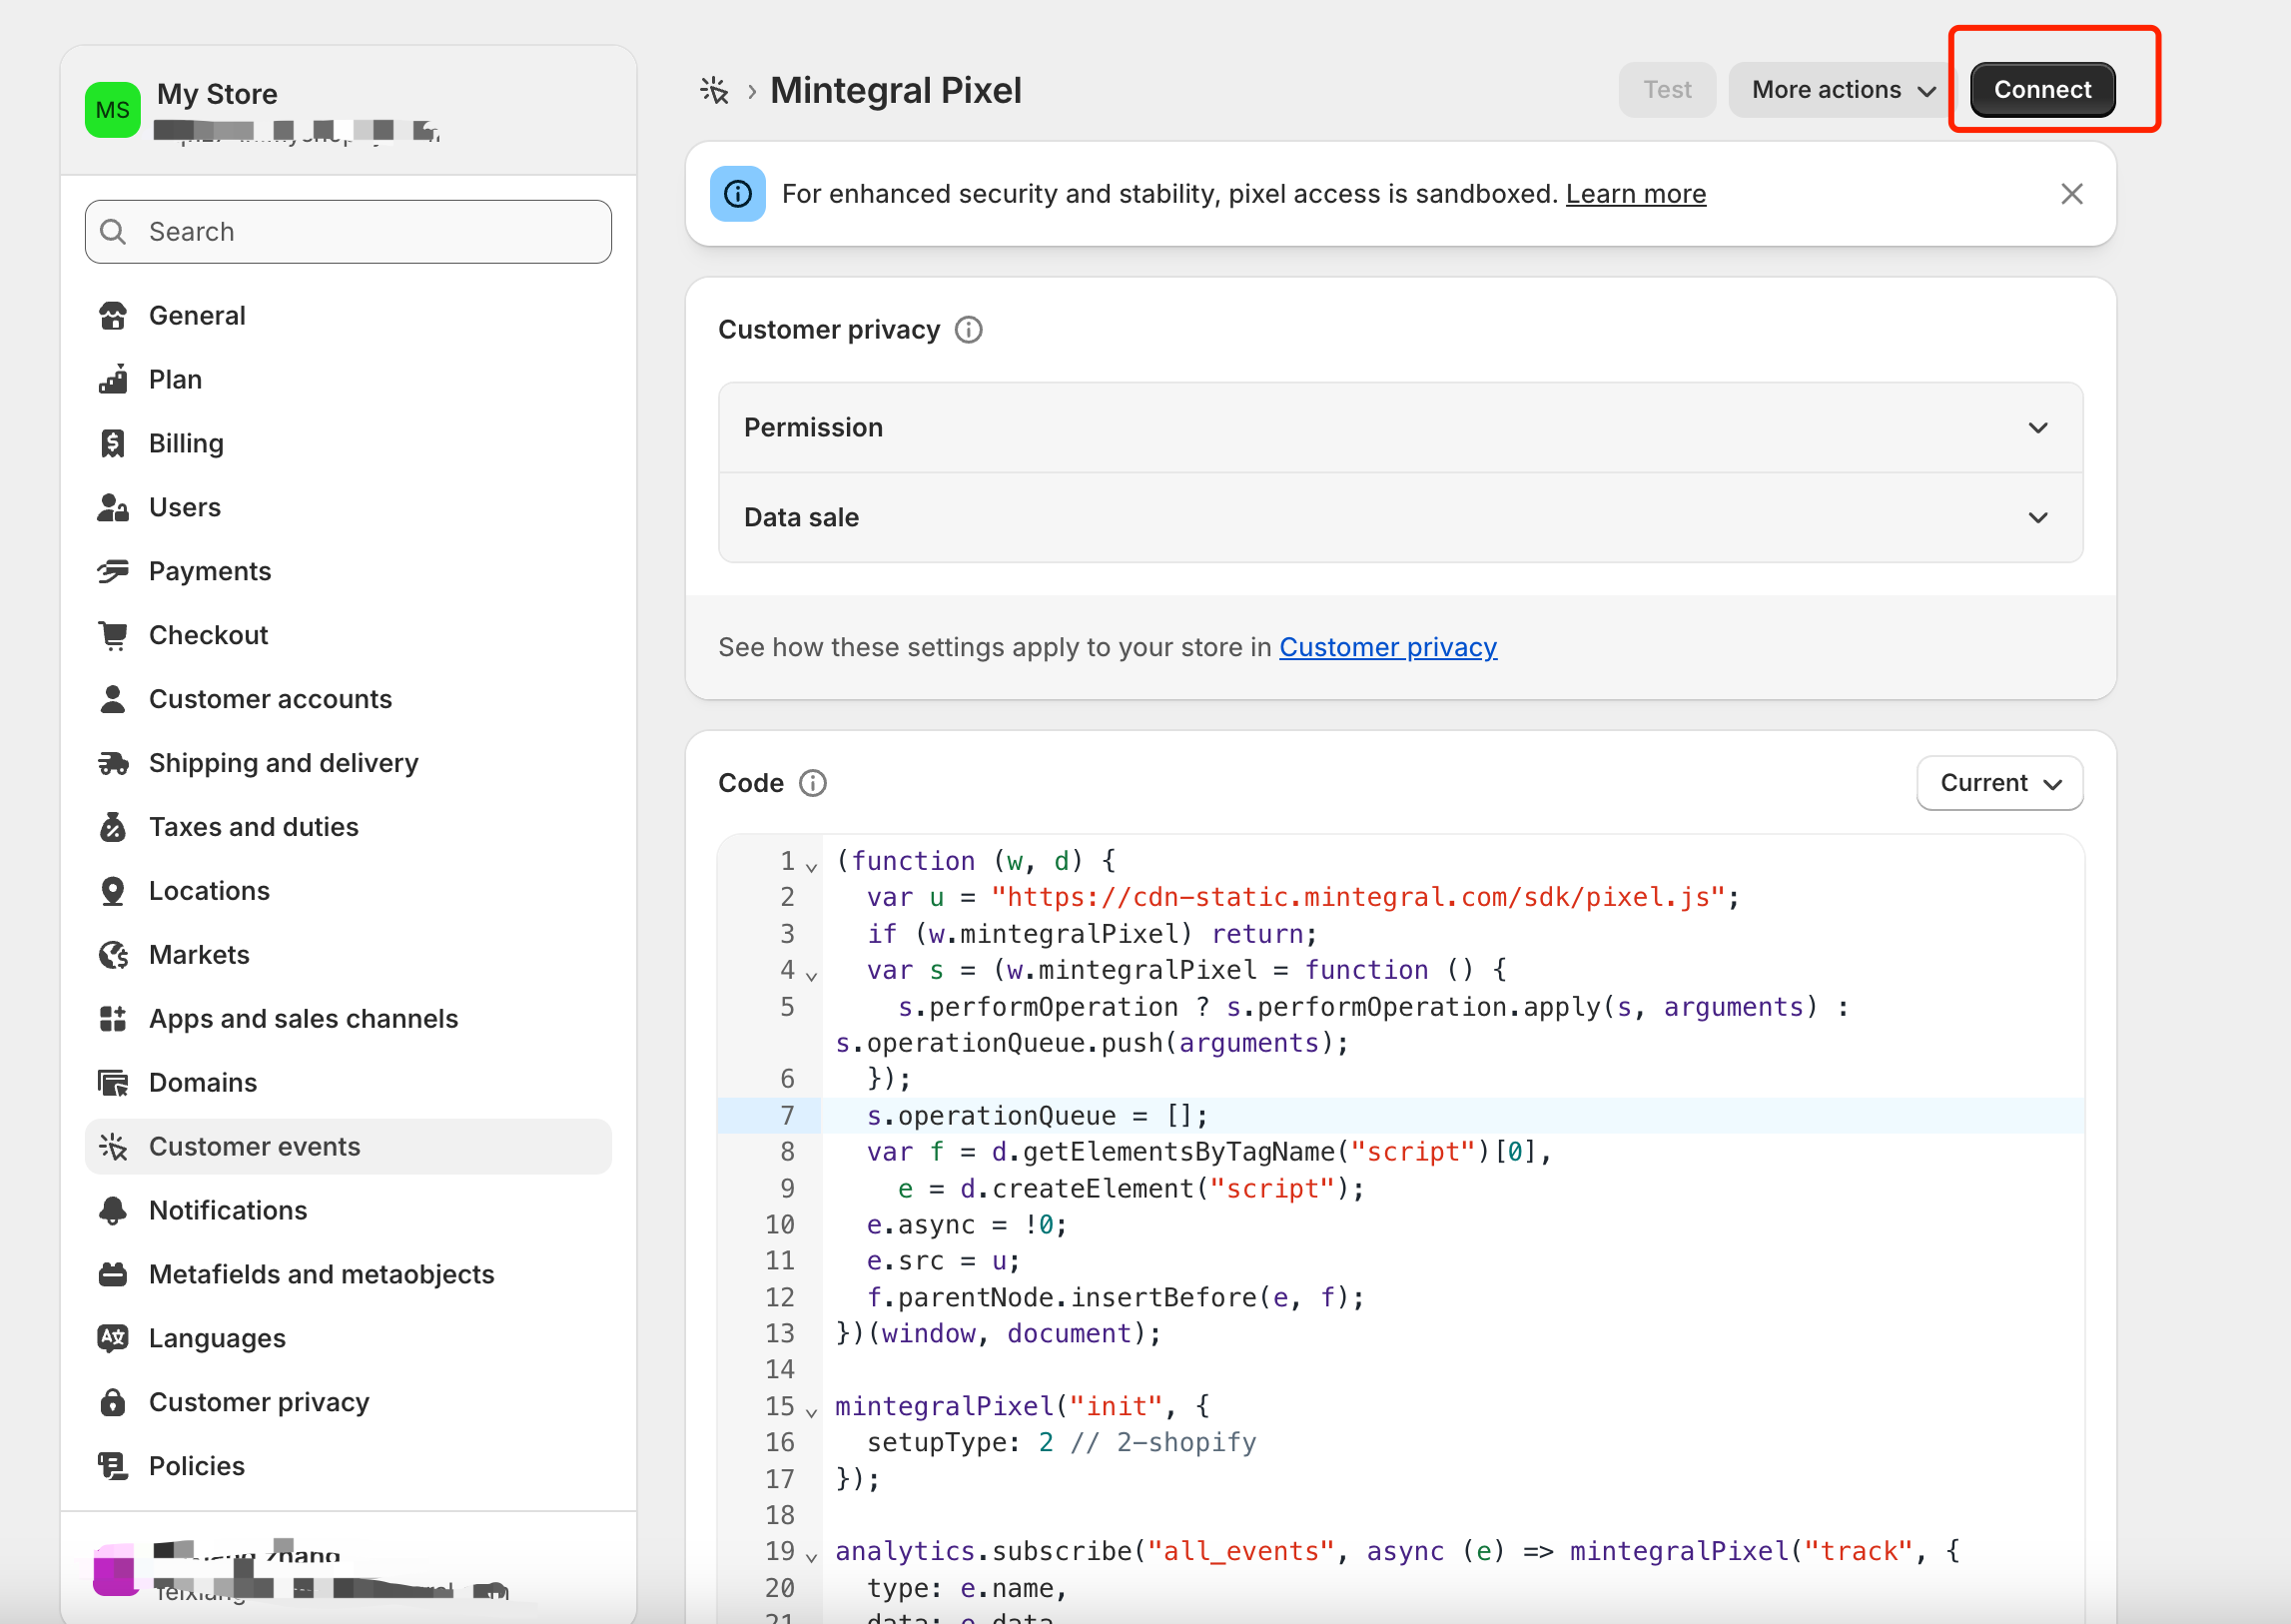
Connect를 클릭합니다. 그러면 “Connect Mintegral Pixel.” 대화상자가 표시됩니다.
-
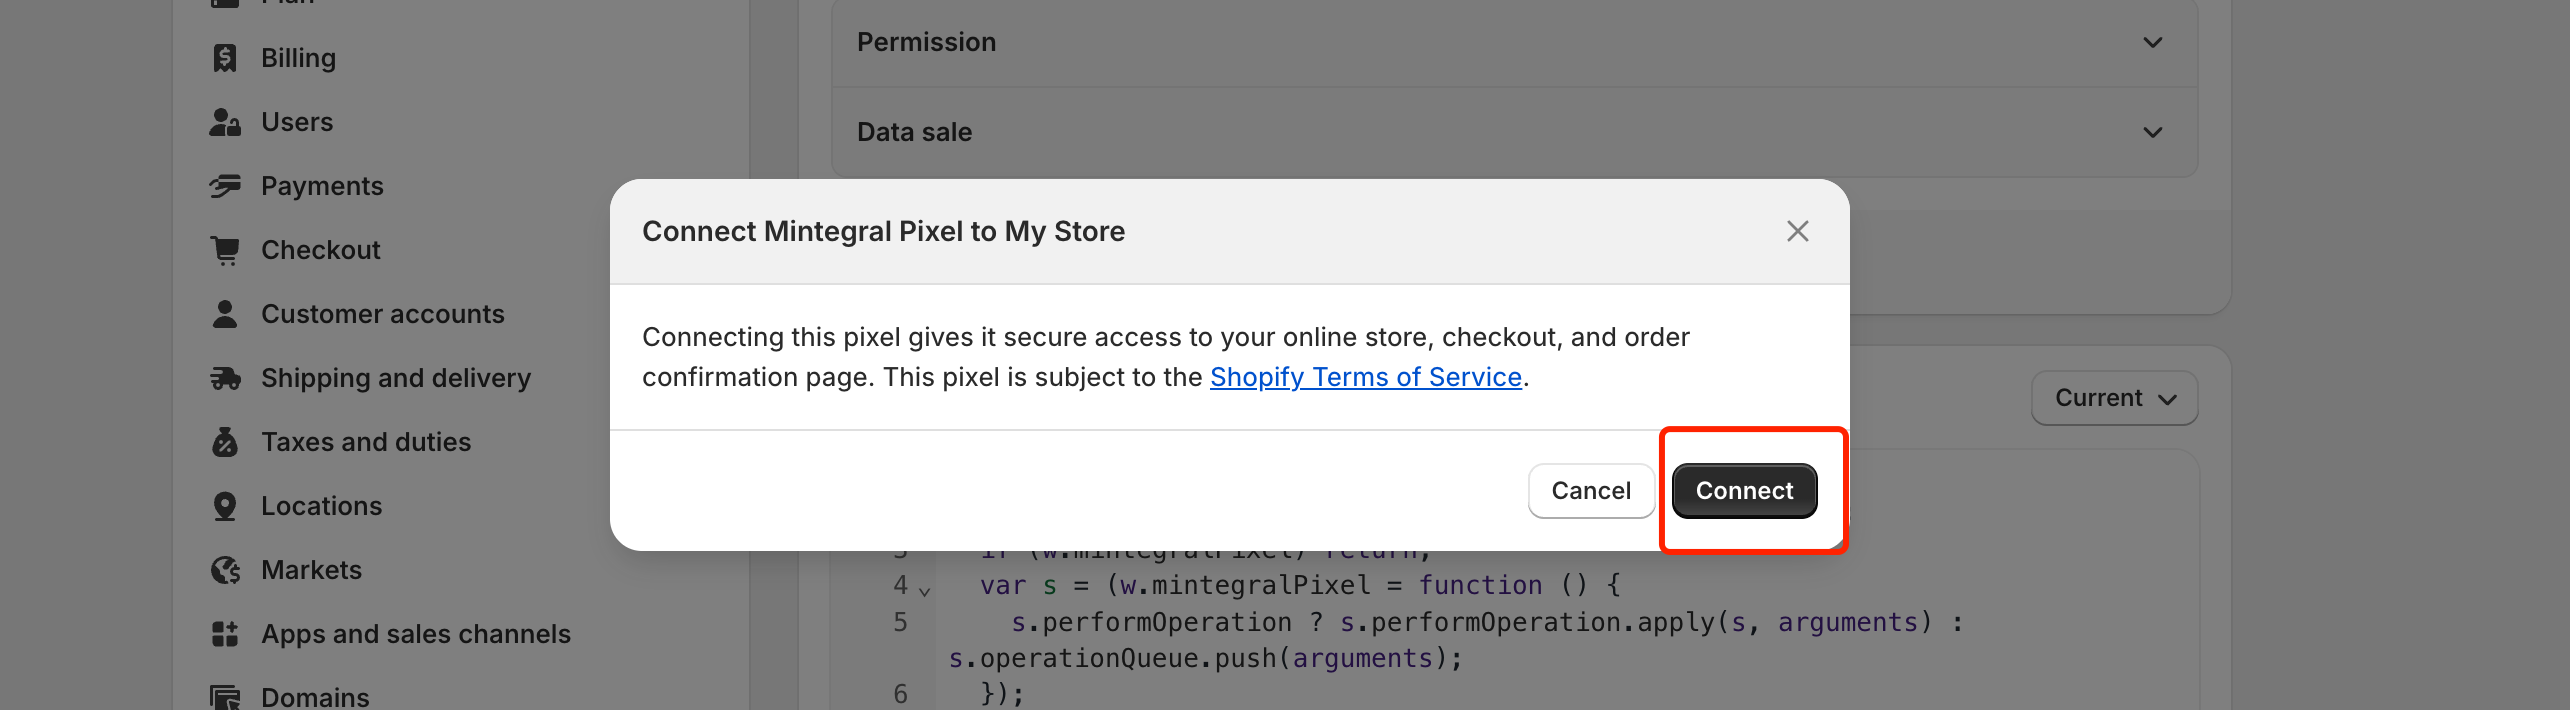
Connect를 클릭합니다.
-
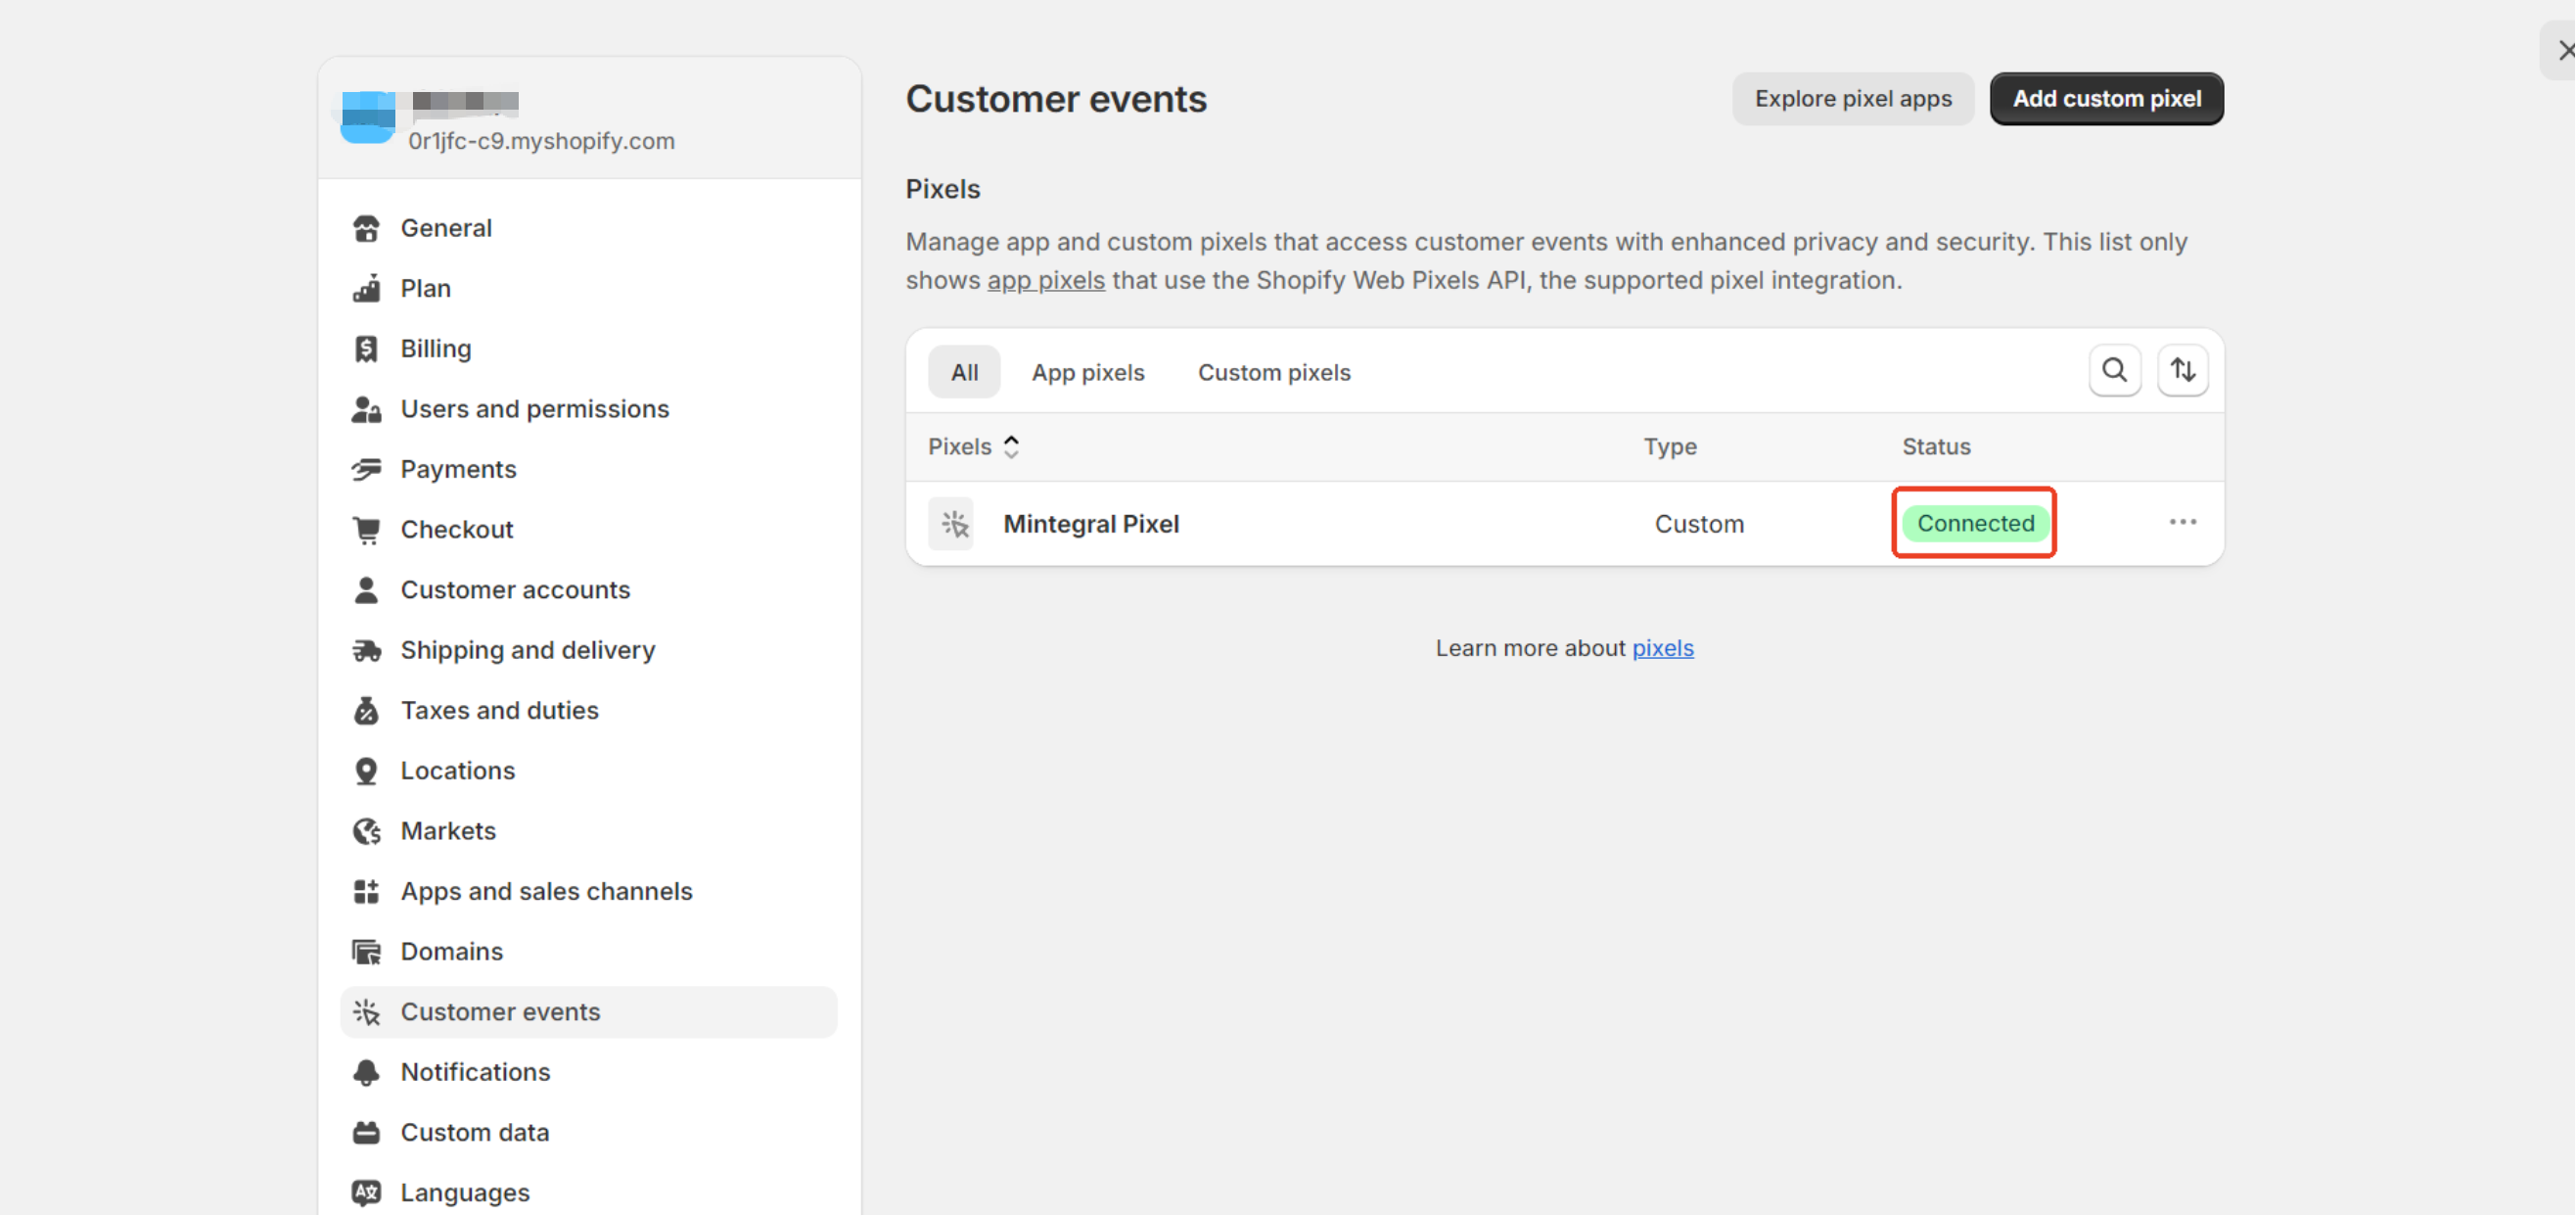
Pixel Status가 Connected로 표시되는지 확인합니다.
이전의
Mintegral Pixel: 빠른 시작 가이드
다음
Mintegral Pixel: 커스텀 온라인 스토어 연동 가이드
최근 수정됨: 2026-08-07
개요